After your artist completes an art activity you can choose to send a picture of their masterpiece to [email protected] so we can add them to the featured artist on the art homepage! In your email make sure to include the artist's first name, grade and the school they attend so we can give them kudos!
Happy creating!
Happy creating!
Week 1 (March 16 - 20)
Activity 1
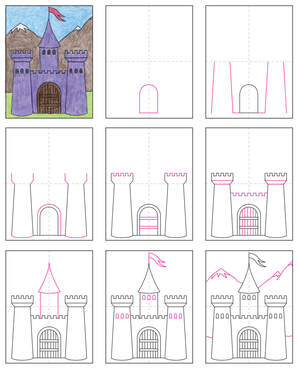
Artists will draw their own castle. Include details such as the ground and sky. Add characters if you wish such as a princess, prince, king, queen, or dragon. Color it with crayons, markers, colored pencils, and/or paint.
Artists will draw their own castle. Include details such as the ground and sky. Add characters if you wish such as a princess, prince, king, queen, or dragon. Color it with crayons, markers, colored pencils, and/or paint.
Activity 2
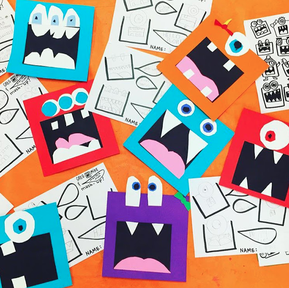
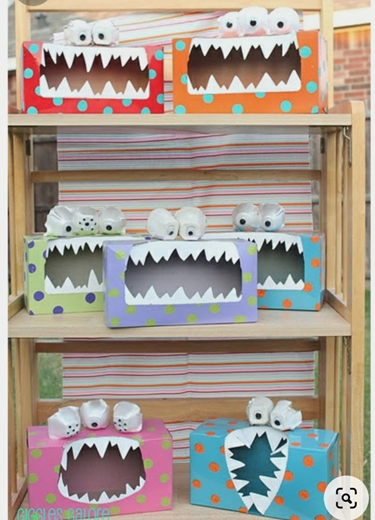
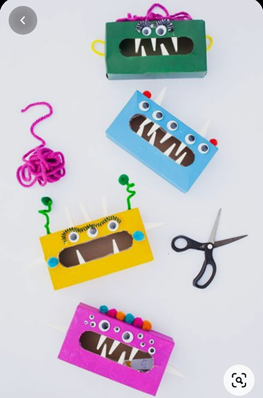
Artists will create their own loud mouth monster. Start with a square, circle, or other shape. You can find a shape in your house and trace it onto your paper. You can either just draw the monster and color it in or you can use different colors of paper for each part of the monster. You will need glue, scissors, crayons, and colored paper if you want do the second choice.
Artists will create their own loud mouth monster. Start with a square, circle, or other shape. You can find a shape in your house and trace it onto your paper. You can either just draw the monster and color it in or you can use different colors of paper for each part of the monster. You will need glue, scissors, crayons, and colored paper if you want do the second choice.
Week 2 (March 23 - 27)
Activity 1
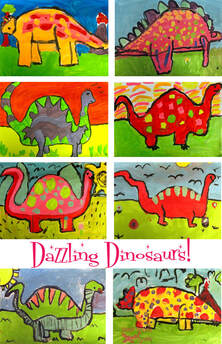
Artists will create their own dinosaur. Use your imagination! It could be wearing clothes, a superhero cape, have human like features, etc! Design a background behind the dinosaur (volcanoes, cities, outer space, etc). Add color with crayons, markers, and/or paint.
Check out Danny and the Dinosaur on youtube: https://youtu.be/xhs4Z2K6CMk
|
Activity 2
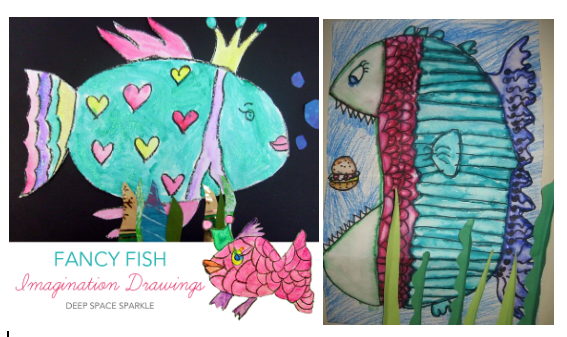
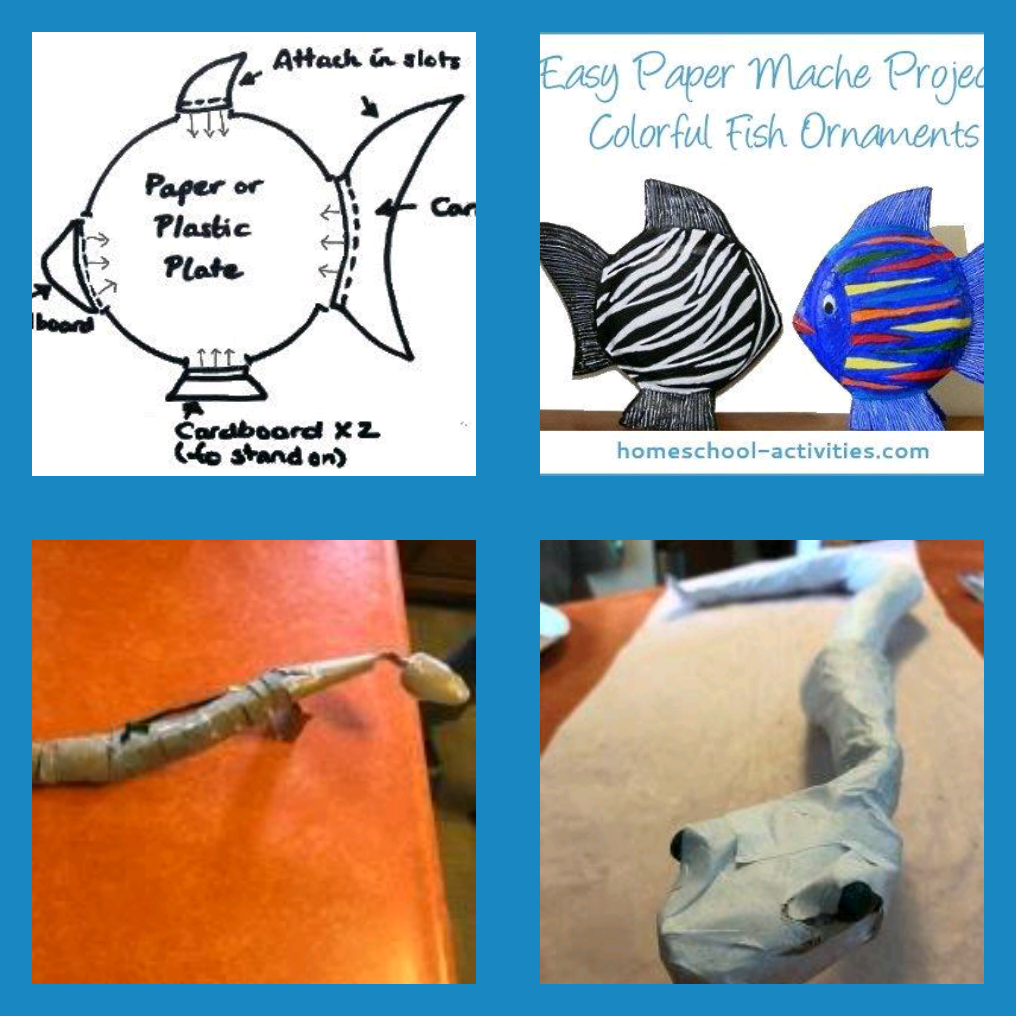
Artists will draw a fish. Artists can create their own unique fish or draw one from a movie. Be creative! Is it silly, funny, scary, or goofy? Color with crayons, markers, and/or paint. Check out the coral reef at this YouTube Video: https://www.youtube.com/watch?v=J2BKd5e15Jc |
Week 3 (March 30 - April 3)
Activity 1
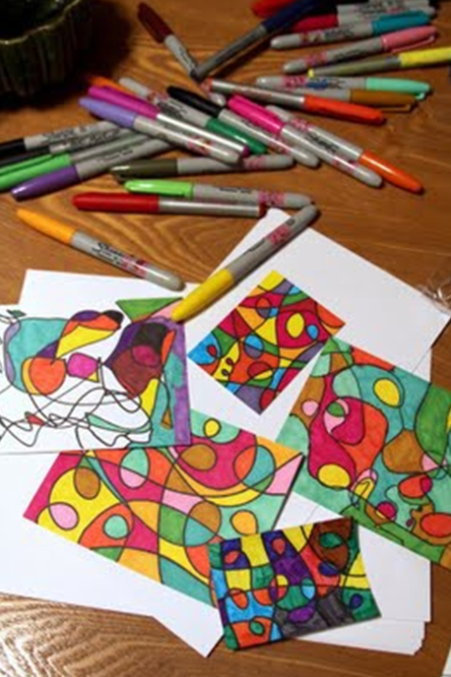
Artists will create a scribble art drawing. Scribble art is a style of drawing by way of scribbling! GASP!! Scribbling?!?! YES, but it is controlled. This means that the drawing is made of abstract lines with no idea of what it will look like in the end. Artists will use a black marker to create a controlled scribble that fills their white drawing paper. Use crayon, marker, colored pencil and/or paint to fill in the spaces that you created.
YouTube Read Aloud - "I'm Not Just A Scribble" by Diane Alber: https://www.youtube.com/watch?v=U8go4ZveIcU
WEEK 4 (APRIL 13-17)
|
Activity 2
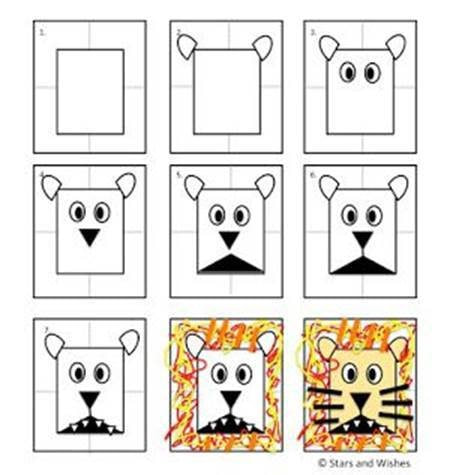
Sketch the lion step by step. Use a black marker, crayon, or colored pencil to give your lion a dark solid outline. Color in the triangle mouth and nose solid black. Change the eyes of your lion to however you would like to show expression! Color the pupil solid. Use colorful markers, crayons, or colored pencils to create texture around the head of the lion to make the mane. Have fun using different color families! If you have yarn at home or other materials, it would be fun to glue textures around the head to create a mane! Choose an Authors in April Project from the Art Page |
|
WEEK 5 (APRIL 20-24)
|
Activity 1
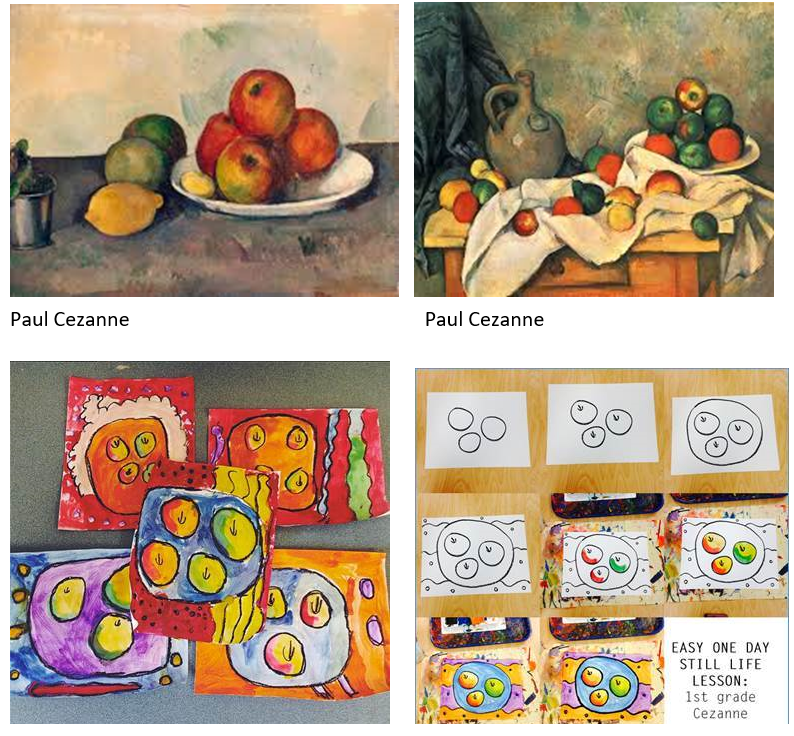
Food is always fun to draw! The artist Paul Cezanne created many still life paintings of food. Take a moment and see what fruit or veggies (or other food) you may have at home. Arrange them on a plate. Sketch your still life with pencil. Your food can overlap! Sketch designs all over the background. Use lines, shapes and patterns. Use black marker, crayons, or colored pencil to outline your plate, food and background design. Use marker, crayons, colored pencils and/or paints to make your still life food colorful! Start with the food, add color to the plate and finally add color to your background! |
WEEK 6 (April 27 - May 1) |
Activity 2
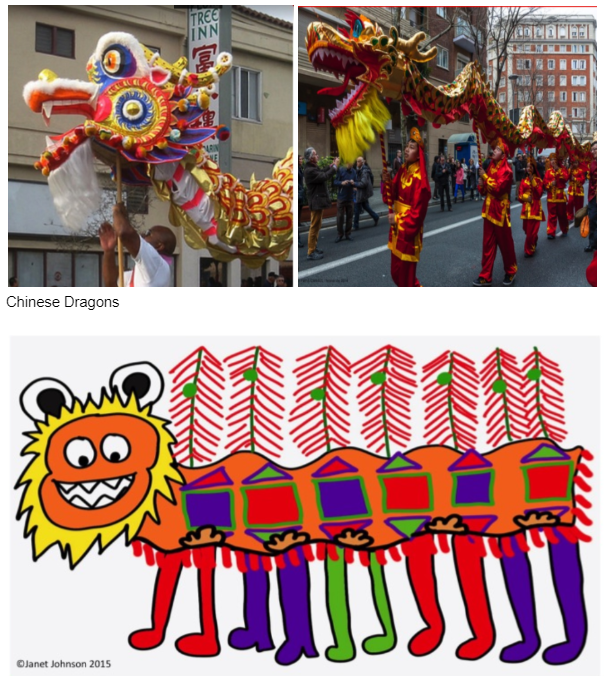
Artists will design a Chinese Dragon. Many Asian cultures celebrate the dragon because it is a symbol of luck and prosperity. Artists will design their own Chinese Dragon puppet. Include a head, body, and any details you can imagine. Spikes, feet, wings! Be creative. Use marker, crayons, colored pencils and/or paints to make your dragon come alive. |
|
Activity 1
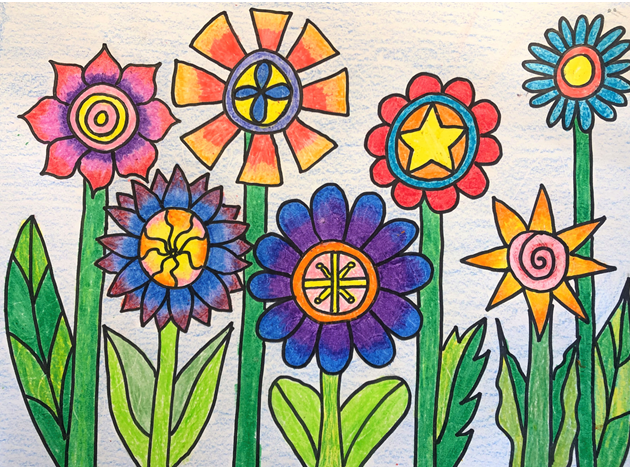
Spring Flowers- Pretty soon our gardens will be filled with spring flowers. Colorful flowers are a great way to brighten up our days after a long gray winter. So let’s get inspired and make up some of the coolest looking flowers we’ve ever seen! You can look at pictures of flowers, look outside and see if anything has bloomed in your yard, or just think of some of your favorite shapes to get started. Check out this tutorial for some step-by-step tips!
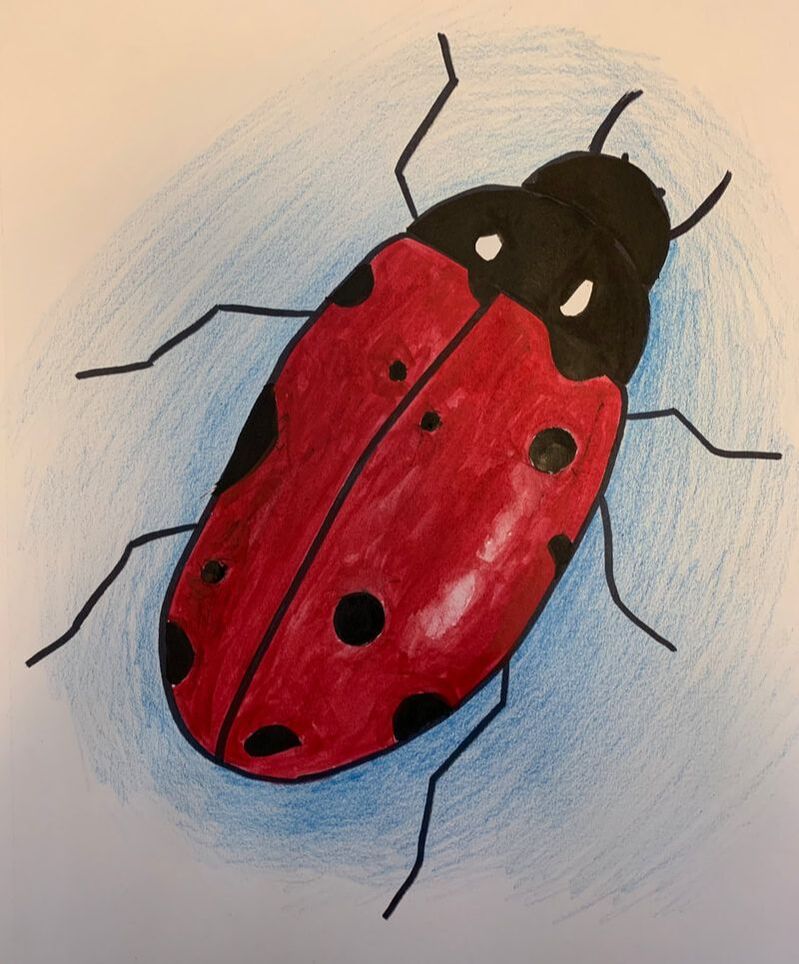
Activity 2 Bug Drawings- Have fun drawing your own bug! If you can, get outside and take a walk to observe all of the different types of bugs that you see. Then grab some paper, a pencil, a marker (preferably black), and whatever material you’d like to color with (paint, markers, crayons). Start by drawing your bug’s body with a marker- make sure to include eyes, a head, a line down the middle of the body, and finally, some crazy legs! Either leave your drawing as a line drawing, or add color! If you’d like to add color, get creative with filling in the shapes that you’ve drawn and make your bug unique! Check out the step by step instructions below.
| ||||
WEEK 7 (May 4- May 8)
|
Activity 1
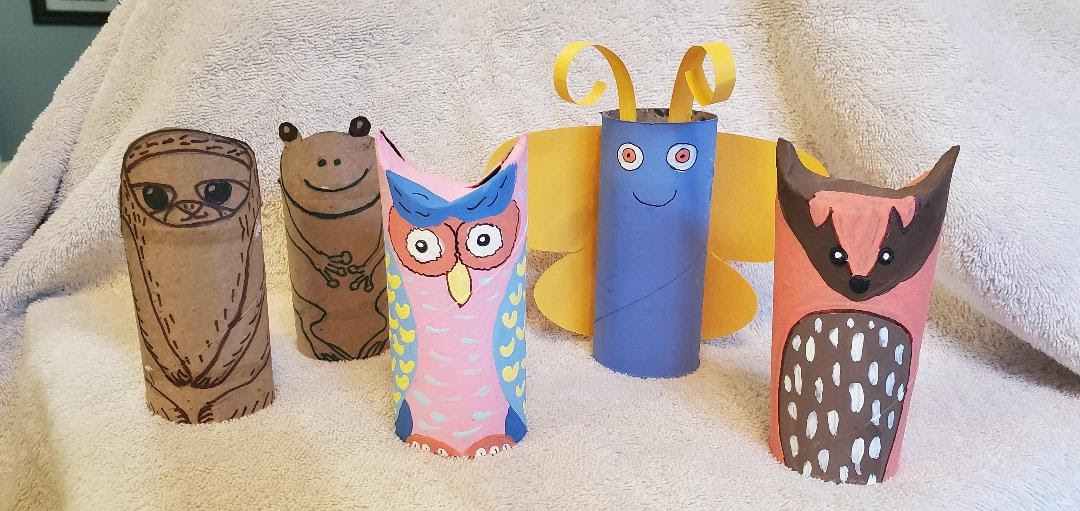
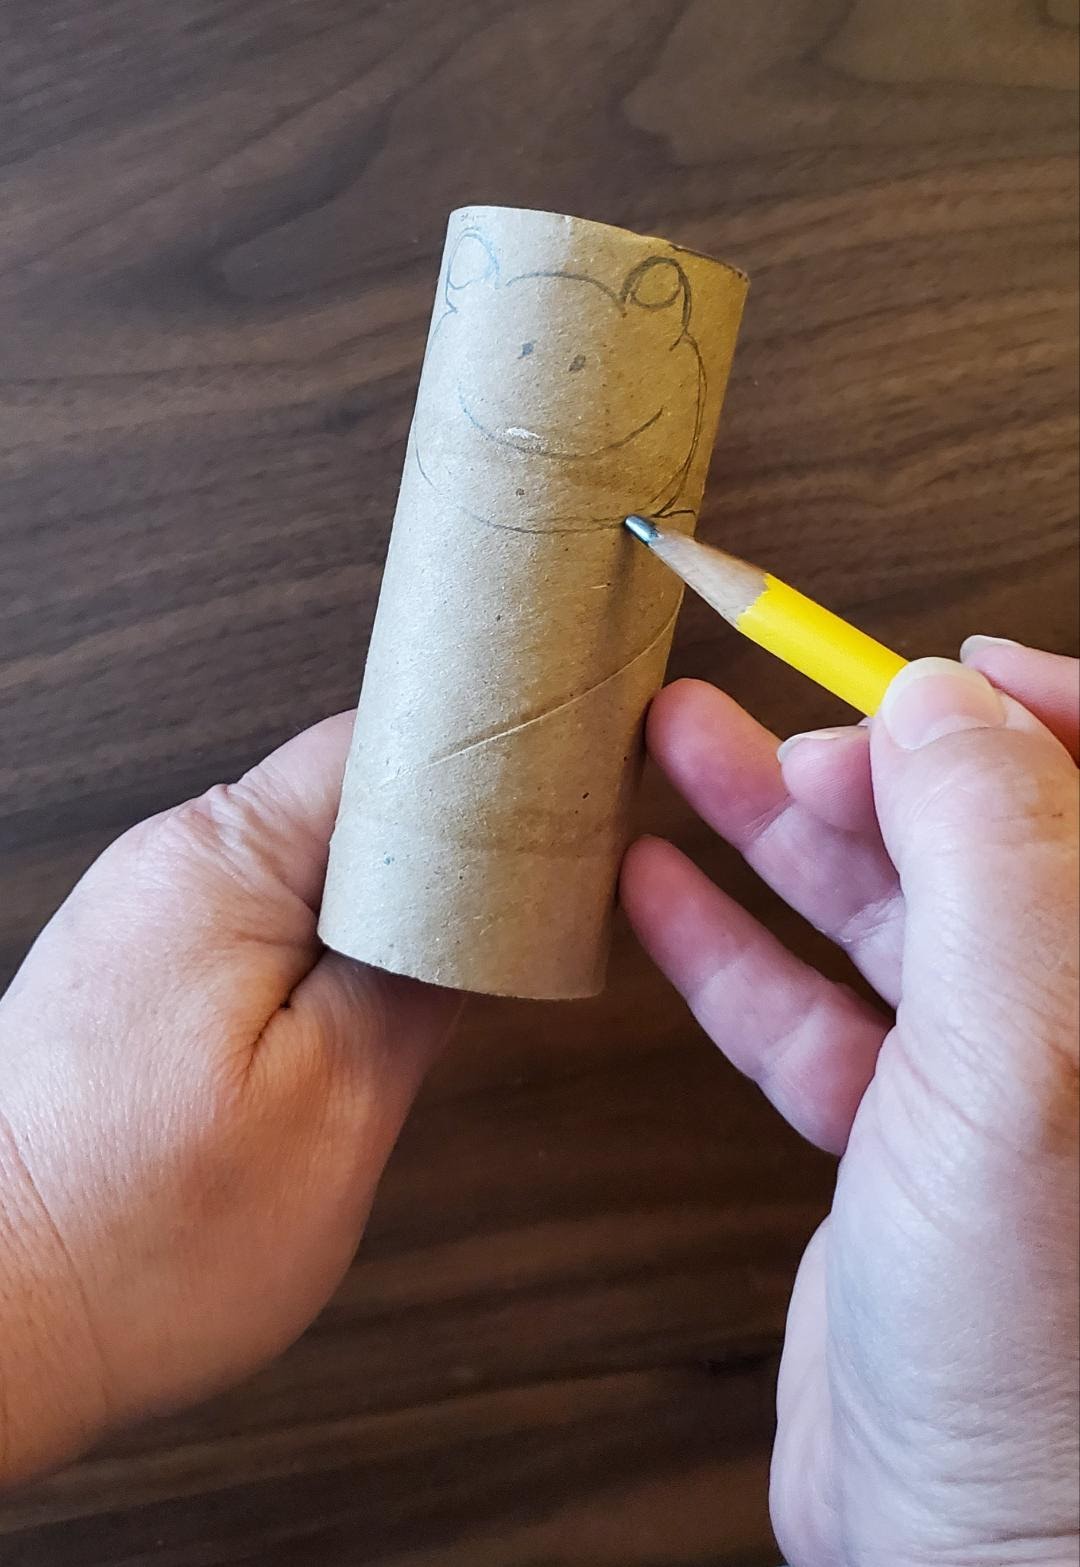
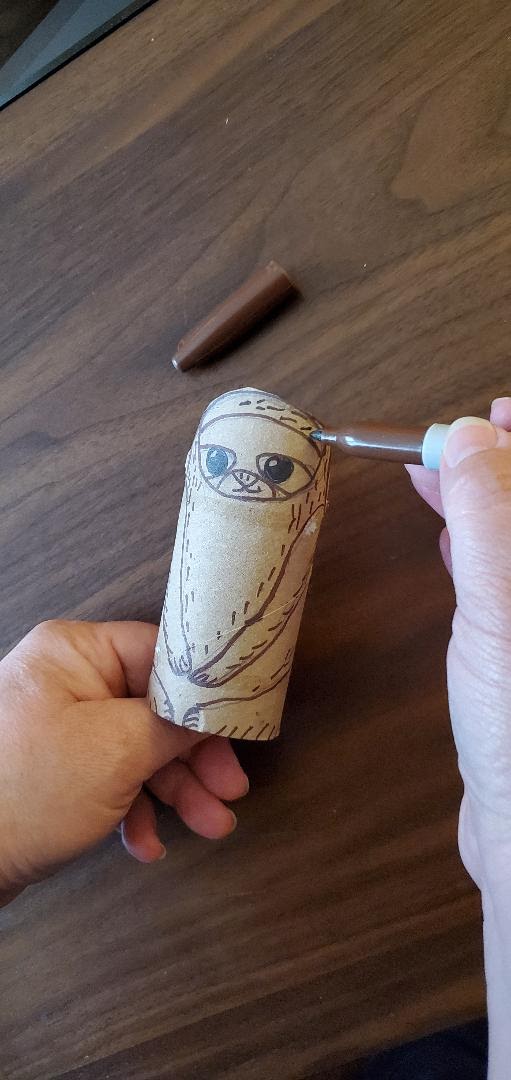
Toilet Paper Roll Animals- Something everyone should have in their house, a toilet paper roll! Create an animal of your choice and use it as a puppet or put it on display. You can always do more than one if you have extra materials. Start by drawing the shapes to make your animals face onto the toilet paper roll. Use a marker or other drawing utensil to trace the lines you drew. You can use markers, colored pencils, crayons or even paint to add detail and color to your animal. You can use scissors to cut around the head or you can gently press the two sides of the same into themselves to close it up and use those points for ears, horns, and feathers. If you have construction paper and glue you can add extras such as ears, noses, wings or tails. If you want some colored paper and don’t have any, you could always use white paper and color it the color you need!
| ||

WEEK 8 (MAY 11-MAY 15)
|
Activity 2
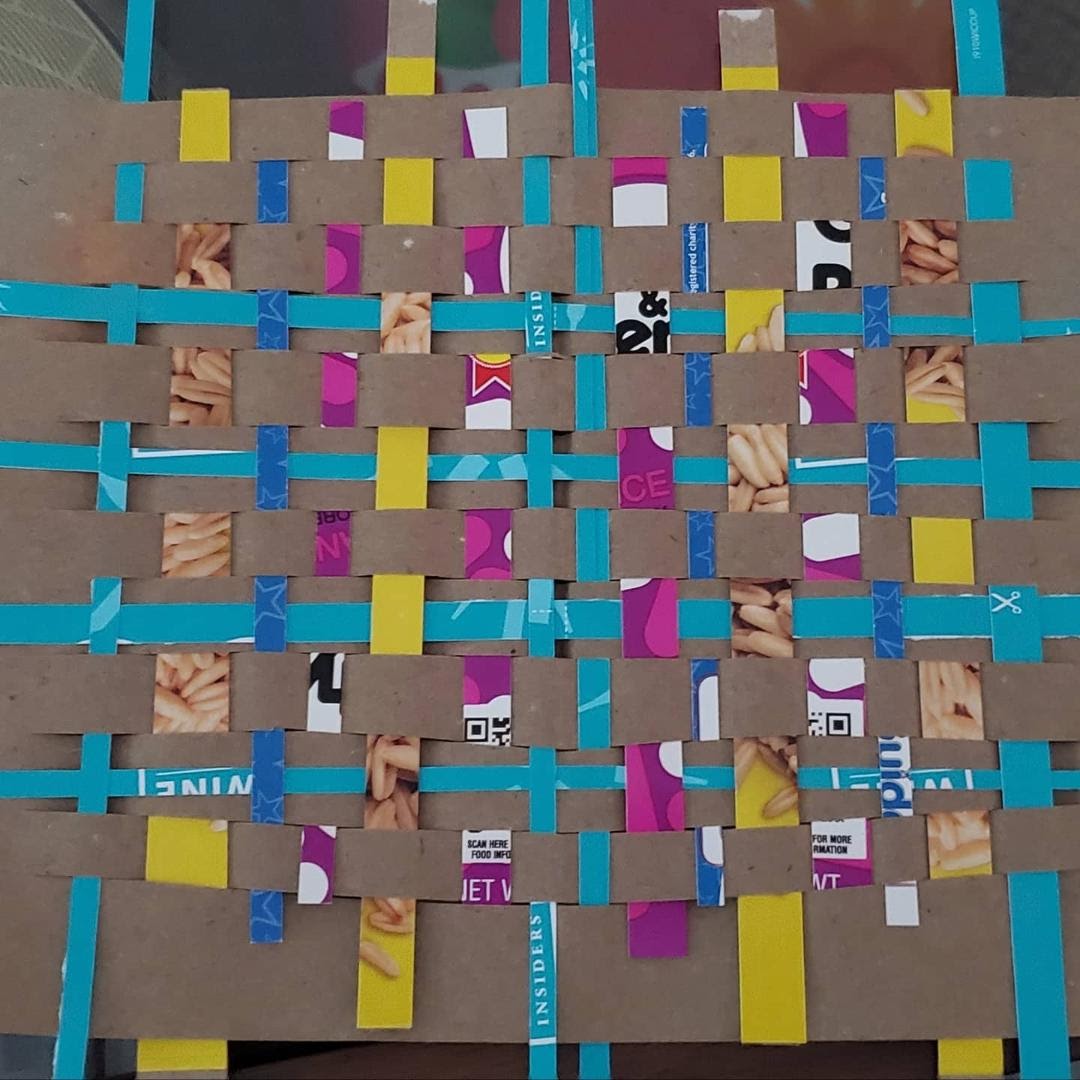
Weaving with Cardboard or Junk Mail- weaving is one of the oldest methods to create everyday items from rugs, fabric, baskets and more. You can weave using a variety of materials from fabric to clay to just everyday objects you find around your house. Today you will be using materials that usually end up in the recycling bin!
| ||
|
Activity 1
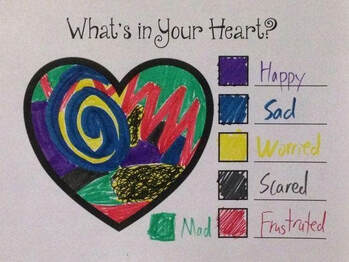
WHAT'S IN YOUR HEART? PARENT PROMPT: Imagine feelings have a color. What would they be? Students will be able to express their feelings through colors, designs, and shapes. It is important for young children to have an outlet for their emotions and identifying them with colors is a fun way to do this and can be the start of good conversations. |
|
|
Activity 2- 3D OPTIONS
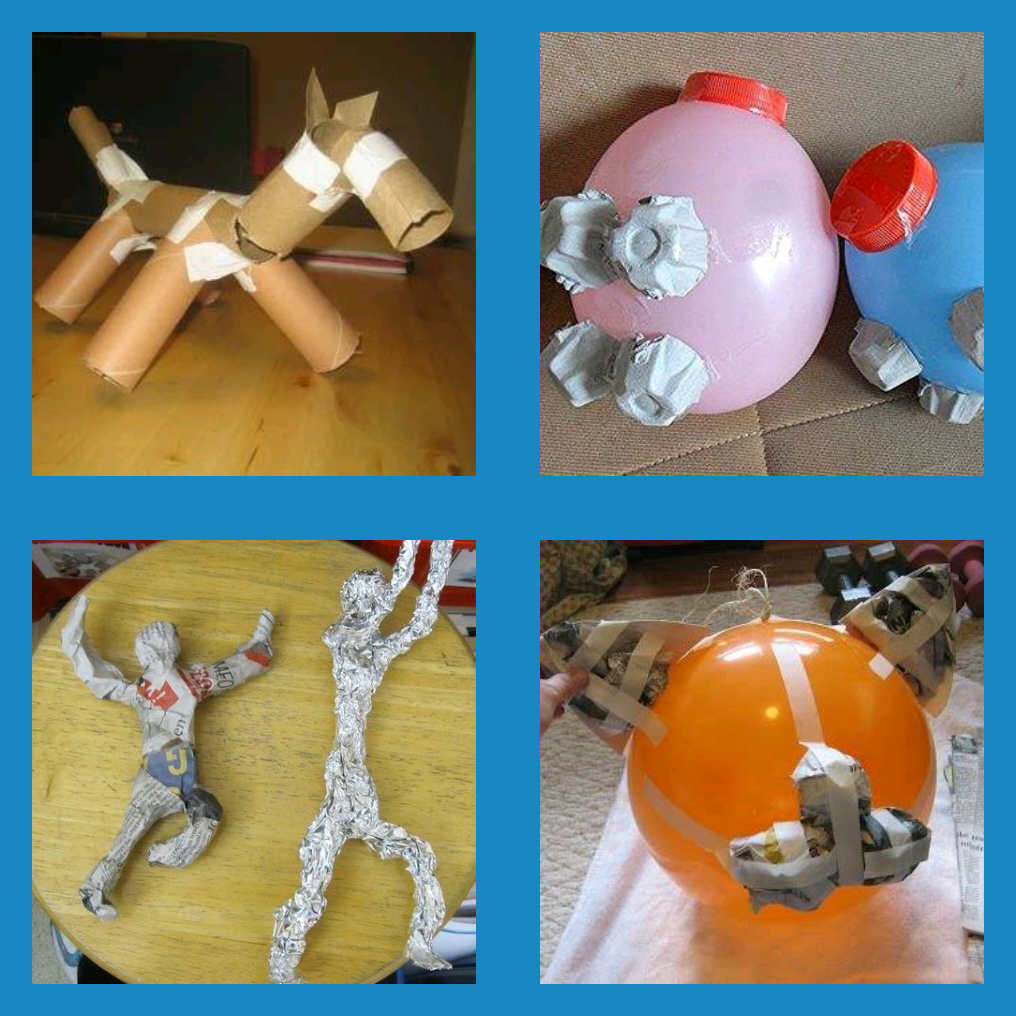
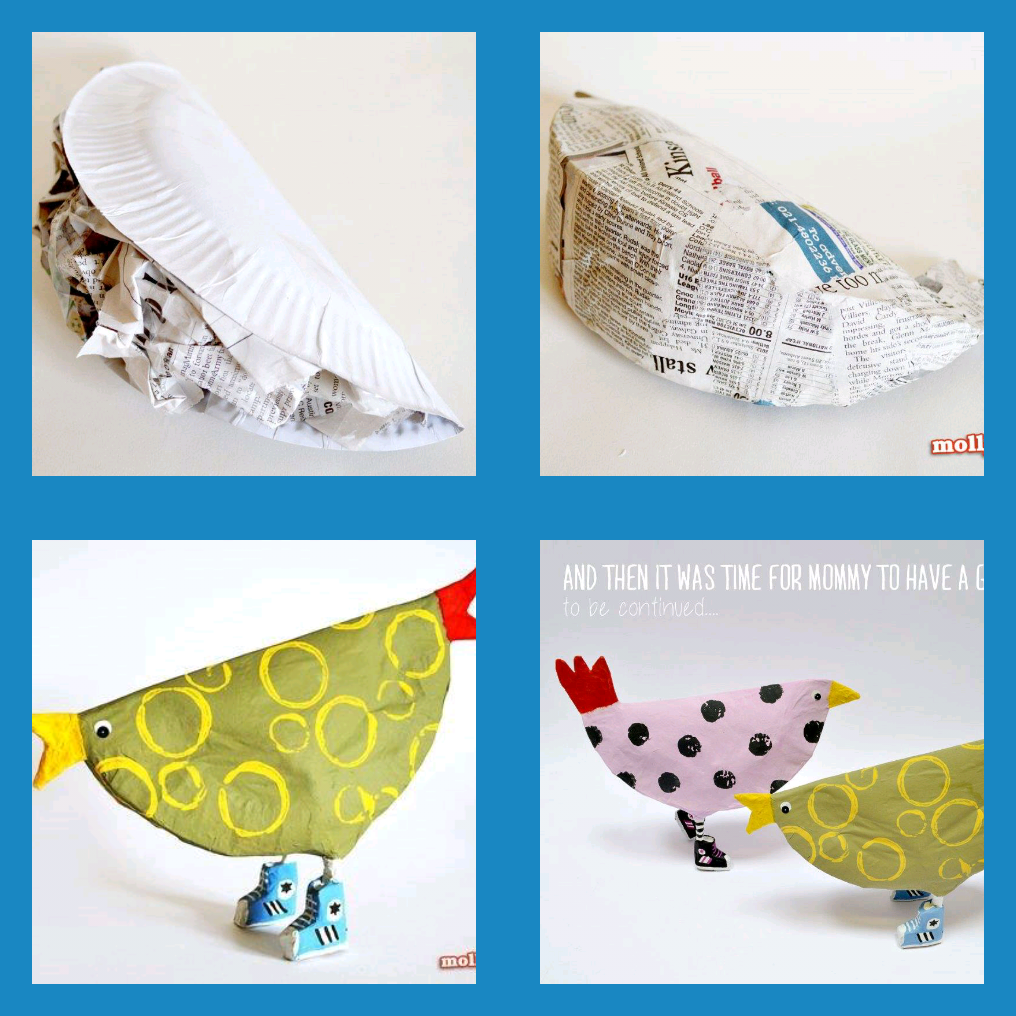
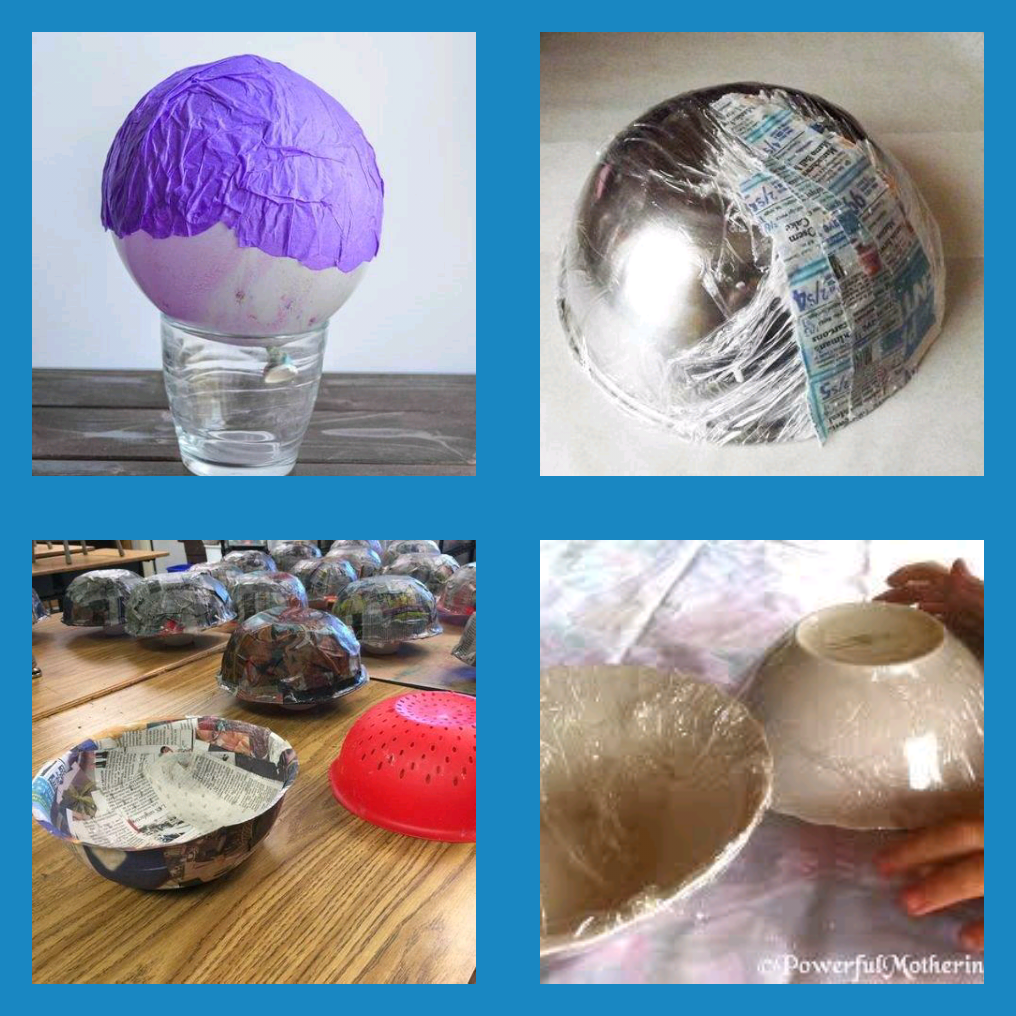
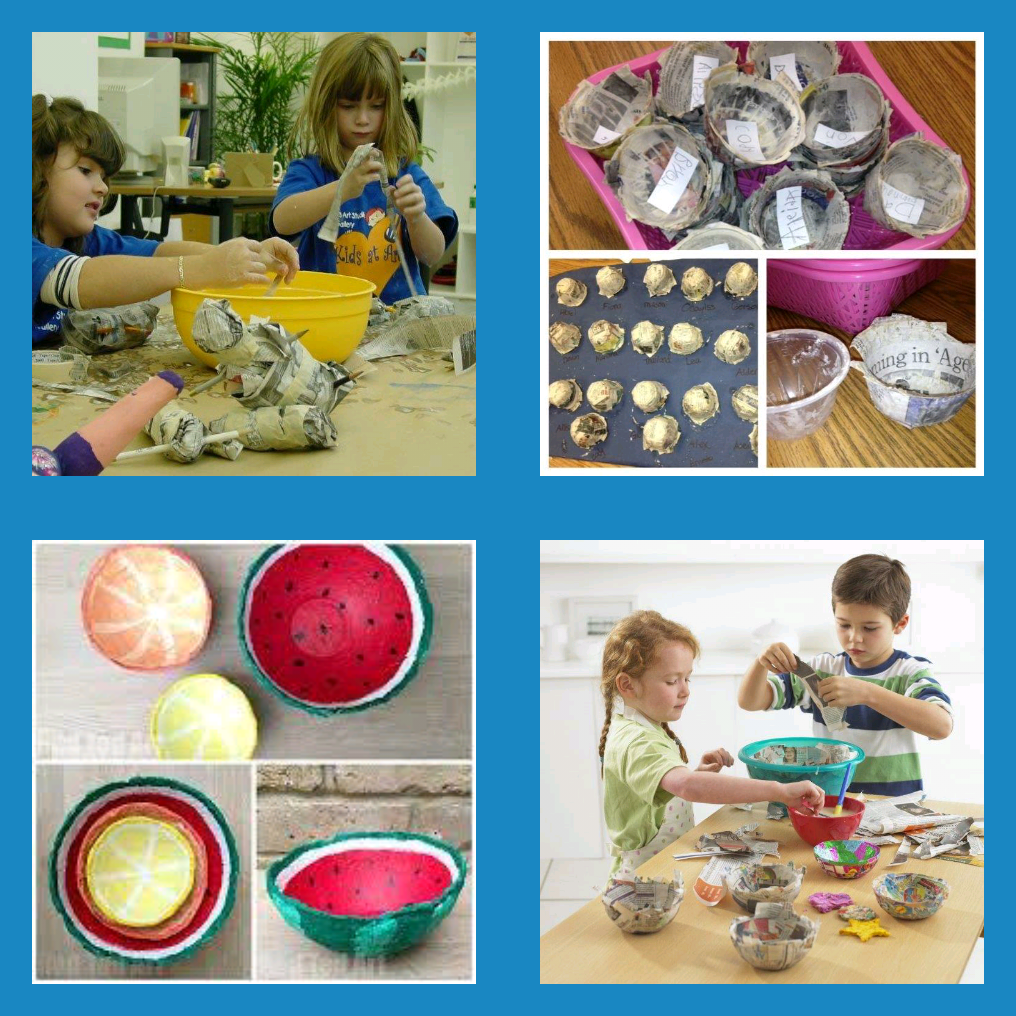
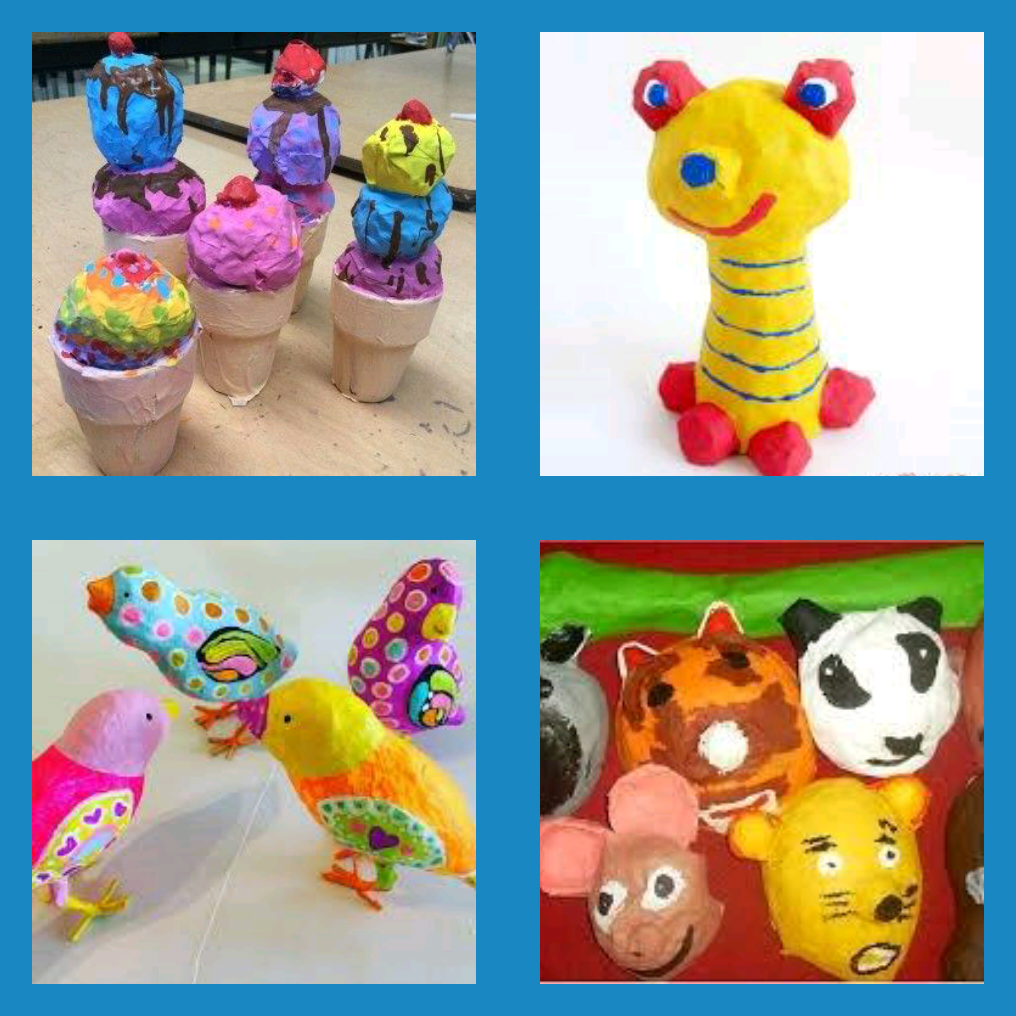
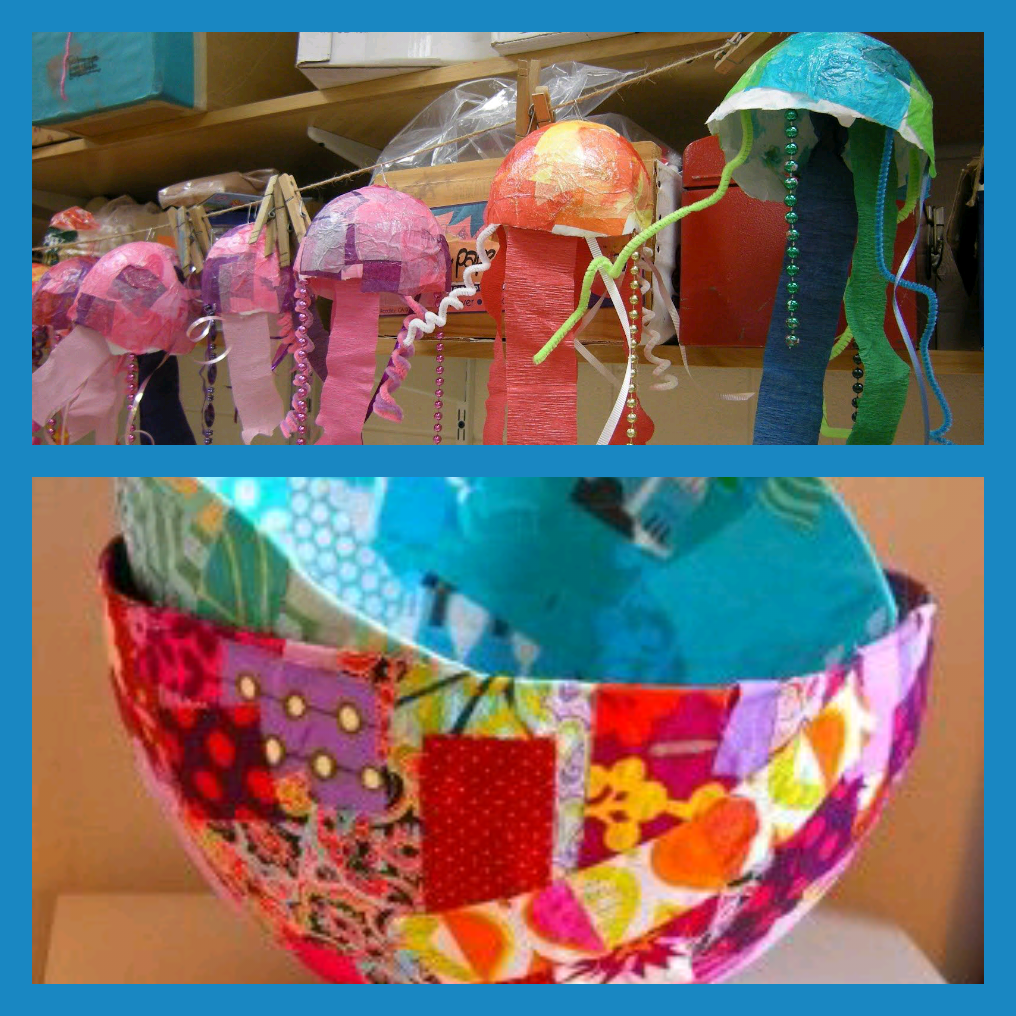
3D PAPER MACHE SCULPTURES Students have an option to create a sculpture of their choice, a bowl, a container, an animal, etc... Students will first build a framework for their sculpture and then add the paper mache paste. Click on the button below to see the full instructions and click on the buttons below to learn how to make the paste at home and how to apply the paste and the strips. |
|
|
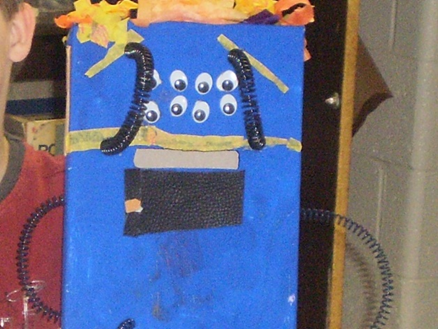
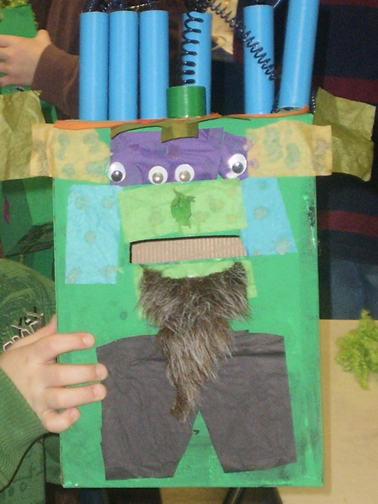
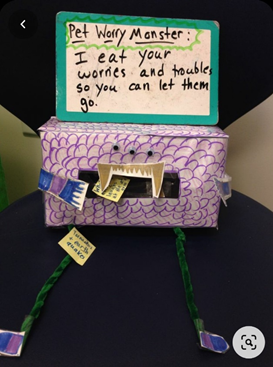
3D WORRY MONSTERS
PARENT PROMPT: Talk about worries or “thinking” with the child and have them identify some worries, thoughts, frustrations, etc. that they would like to not think of in that moment. Creating a worry monster for young students is a great way for children to express their thoughts and emotions. Students have the opportunity to use recycled goods to create their very own worry monster, animal or whatever creation they would like. Students will be able to use this worry monster to put their worries or thoughts, a place where they can feel free to express themselves. |


WEEK 9 (MAY 18-MAY 22)
|
Activity 1
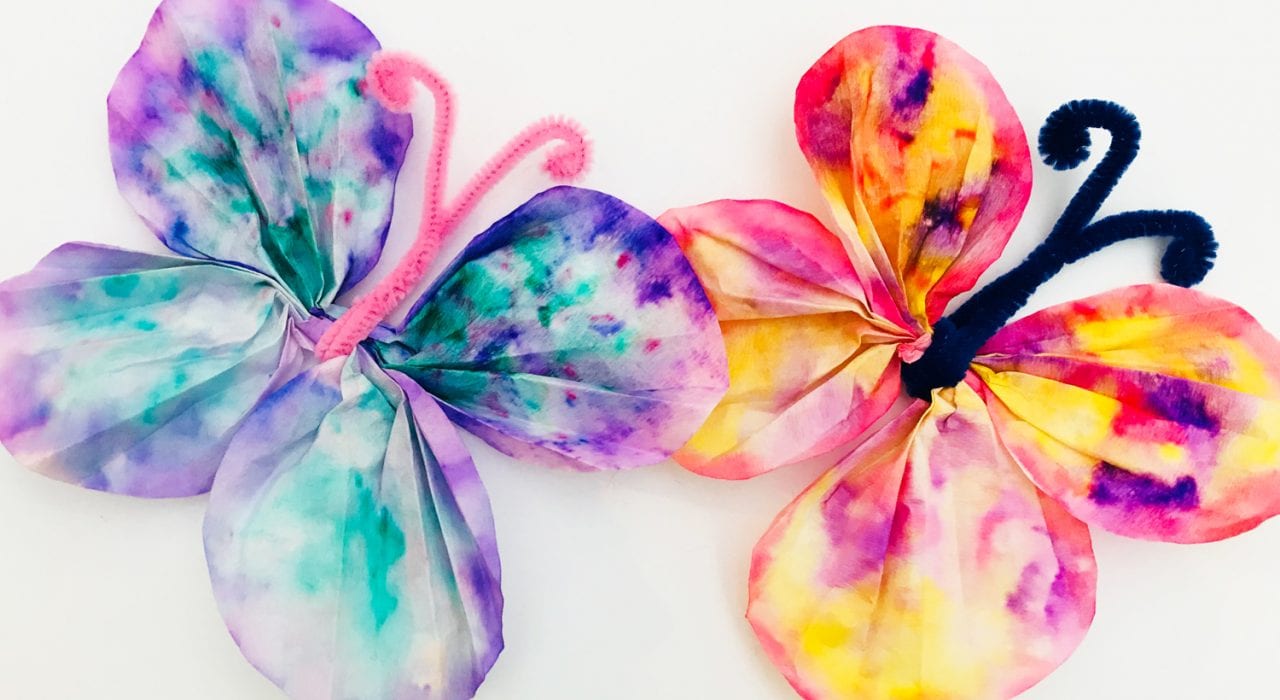
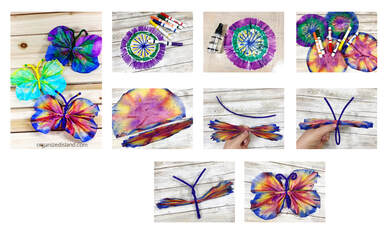
COFFEE FILTER BUTTERFLY Students will be able to make colorful butterflies with minimal supplies. Students can go outside and see if they can find butterflies or work with a grown up to look up online different colorful butterflies. Step 1: Lay out the filter and use markers to scribble, color but leave a little bit of white space but no too much. Step 2: Spray the filter with water and let it dry Step 3: Fold the filter fan fold back and forth Step 4: Take a pipe cleaner and fold in half Step 5: Place the filter in the middle of the piper cleaner. Step 6: Twist the pipe cleaner until the pipe cleaner is twisted except the top which would be the antennas. Step 7: Pull out the sides of the coffee filter so they form wings. |
Activity 2- Glue Drawing
Glue drawing and chalk or oil pastels
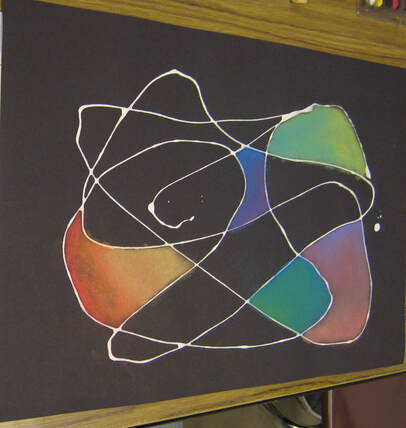
Students will be able to draw on a black paper with glue and color the spaces in between the glue lines with pastels, chalk, or crayons.
Step 1: Draw either a simple design or random line design all over the black paper. Leave a lot of spaces for the black paper to show. If you want to do this with white paper. You can draw a simple design or random line design with a thick marker and then trace over that with the white glue and the color of the marker will show through when the glue dries.
Step 2: Use either chalk or oil pastels if you would like to work on blending. In one of the open spaces of black, color with one color and add another color next to it in the same space or on top of it and smear it with your fingers to get a new color and a blending effect.
Step 3: Continue step 2 until the design has colors in the spaces.
If you don't have oil pastels or chalk, you can blend with colored pencils.
Activity 2- Glue DrawingGlue drawing and chalk or oil pastels
Students will be able to draw on a black paper with glue and color the spaces in between the glue lines with pastels, chalk, or crayons.
Step 1: Draw either a simple design or random line design all over the black paper. Leave a lot of spaces for the black paper to show. If you want to do this with white paper. You can draw a simple design or random line design with a thick marker and then trace over that with the white glue and the color of the marker will show through when the glue dries.
Step 2: Use either chalk or oil pastels if you would like to work on blending. In one of the open spaces of black, color with one color and add another color next to it in the same space or on top of it and smear it with your fingers to get a new color and a blending effect.
Step 3: Continue step 2 until the design has colors in the spaces.
If you don't have oil pastels or chalk, you can blend with colored pencils.
Glue drawing and chalk or oil pastels
Students will be able to draw on a black paper with glue and color the spaces in between the glue lines with pastels, chalk, or crayons.
Step 1: Draw either a simple design or random line design all over the black paper. Leave a lot of spaces for the black paper to show. If you want to do this with white paper. You can draw a simple design or random line design with a thick marker and then trace over that with the white glue and the color of the marker will show through when the glue dries.
Step 2: Use either chalk or oil pastels if you would like to work on blending. In one of the open spaces of black, color with one color and add another color next to it in the same space or on top of it and smear it with your fingers to get a new color and a blending effect.
Step 3: Continue step 2 until the design has colors in the spaces.
If you don't have oil pastels or chalk, you can blend with colored pencils.
Activity 2- Glue DrawingGlue drawing and chalk or oil pastels
Students will be able to draw on a black paper with glue and color the spaces in between the glue lines with pastels, chalk, or crayons.
Step 1: Draw either a simple design or random line design all over the black paper. Leave a lot of spaces for the black paper to show. If you want to do this with white paper. You can draw a simple design or random line design with a thick marker and then trace over that with the white glue and the color of the marker will show through when the glue dries.
Step 2: Use either chalk or oil pastels if you would like to work on blending. In one of the open spaces of black, color with one color and add another color next to it in the same space or on top of it and smear it with your fingers to get a new color and a blending effect.
Step 3: Continue step 2 until the design has colors in the spaces.
If you don't have oil pastels or chalk, you can blend with colored pencils.
